How to hunt in Avatar: Frontiers Of Pandora
Here are the best practices for hunting in Avatar: Frontiers Of Pandora
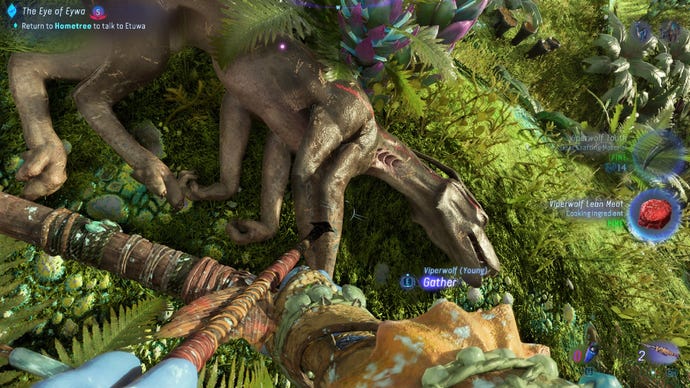
Want to master the art of the hunt in Avatar: Frontiers Of Pandora? The lush forests of Pandora are full of all manner of fauna in Avatar: Frontiers Of Pandora, from the small and sleek Viperwolves to the hefty Sturmbeests. Many of the creatures you'll run into can easily escape your grasp or dash you into pieces at a moment's notice, and hunting them is a delicate balance between acknowleding the power of nature and gathering the resources you need to survive. Those who expect to rush in and harvest materials with guns blazing are going to be sorely frustrated.
With this in mind, patience and preparation are key to succeeding on Pandora's fertile grounds. This guide will detail general tips that'll make your life easier on any hunting expedition in Avatar: Frontiers Of Pandora, from reading up on your prey to ensuring that you maintain the traditional Na'vi respect for the land.
What are the best hunting practices in Avatar: Frontiers of Pandora?
Study creature behaviours in the Hunter's Guide
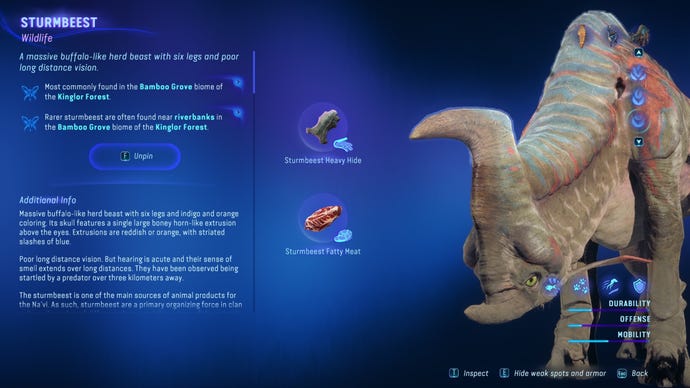
The Hunter's Guide in Avatar: Frontiers Of Pandora is a substantial codex full of entries on Pandora's wildlife that detail everything from their visual flairs to their egg-laying tendencies. Take some time to read up on the beast you intend to track to learn how it'll react in the field. The entry for Scarab Crawlers, for instance, reveals that these scavengers hang out in tiny packs and gravitate towards dead carcasses. Upon finding a carcass, the entire pack will feast and defend the area from intruders. Now you have a basic understanding of a Scarab Crawler's behaviour in the wild, and the next time you see a group of three or four of these aggressive reptiles around a corpse, you know that they're going to attack with extreme prejudice if you get too close. If you don't want to bother with reading text, you can also see a quick summary of behaviours by looking at the icons above the creature's Durability, Offense, and Mobility bars.

Take note of age differences and weak points
Scan the righthand side of each animal entry in the Hunter's Guide to see if the creature in question has visual differences when it's Young, an Adult, or Mature. For instance, Hexapedes and Sturmbeests both boast varying colours depending on their age - a Hexepede's fur ranges from blue to purple as it gets older, and a Sturmbeest pup sports light patterns on its hide that increase in vivid contrast as it matures. You'll want to observe the stats of each creature to see if there are noticeable changes depending on their age as well. For example, Mature Sturmbeests have the highest durability, so if you want to easily bring down one of these buffalo-like beasts, you'll have an easier time going for a youngling. However, there's a delicate balance to be mastered here - Adult and Mature creatures, while rarer, will provide much better materials and ingredients after a kill than their younger counterparts.
Next, familarise yourself with the creature's weak points. Be sure to select the Show weak spots and armor option on each creature entry. Then hit the Inspect option to freely rotate the creature's model, letting you pinpoint exactly where you need to land your shots. For some creatures, the weak area isn't entirely obvious - for example, Scarab Crawlers are vulnerable on their underneck region, and you'll need to rotate their model a bit and wait for their roar animation to see the perfect spot.
Pin your target, reveal your biomes, then follow scent trails
Once you know the behaviours and quirks of your prey, Pin the creature to your map so you'll always have easy access to the list of biome locations where it might be located. When viewing your map, be sure to select Show Biomes to see the contours and range of the areas you need to search. You can also set waypoints to ensure you know the right path to follow to get to the biome. Frankly, Avatar: Frontiers of Pandora's map is an overly busy affair, but once you've done this a few times it'll become second nature.
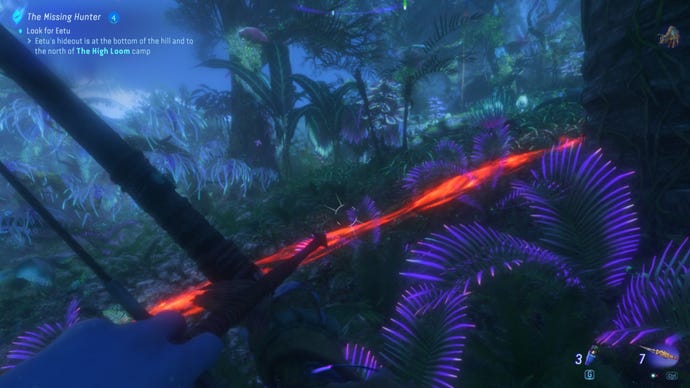
When you're finally in the correct biome region, you'll start seeing scent trails. Highlight and Inspect these with your Na'vi Senses and pay attention to the colour. Hostile creatures will be marked with a red scent trail, and once you come upon this shade it's worth preparing your weapons and staying ready for the possibility of them attacking you before you attack them. You can reassign scent trail colours and see a list of all of colours in the Settings menu, under User Interface.

Crouch, move slowly to avoid making noise, and reposition yourself
Now that you're finally in proper predator mode, Avatar: Frontiers Of Pandora becomes less of an open world Ubisoft action-adventure and more reminiscent of something like theHunter:Call of the Wild. You'll need to be patient and avoid rushing in, and crouching or moving slowly will go a long way towards ensuring that your prey doesn't notice you ahead of time. Once your presence becomes known, creatures will either buck away or attack, and it's best to quickly reposition yourself if you can. If higher ground is available, take it. If you can take cover to ensure that you aren't trampled to death by that Sturmbeest you just shot in the neck, that would also be most advantageous.
Use Na'vi weapons, and go for Merciful and Clean Kills
Avatar: Frontiers of Pandora and its associated films are all about respecting the land and fighting against the colonisation of the RDA, and this is particularly evident while hunting. It's certainly easier to blast your quarry with an assault rifle, but hunting with RDA weapons - and even with certain types of explosive ammunition, like Sling Staff grenades - will destroy the precious materials that you need to harvest from your kills, labeling them as Ruined. If you're especially violent and deal unneeded damage to the environment (for instance, using your Sling Staff to aggressively blow up everything), you may even acquire Disharmony, which will temporarily prevent you from riding your Ikran, interacting with certain NPCs, and using your Na'vi Senses.
With this in mind, stick to natural Na'vi weapons like your Longbow and Heavy Bow. Use your Na'vi Senses to highlight your prey's weak point and fire with the aim to take down the beast with as few shots as possible. This will net you a Merciful Kill bonus. If you're lucky and possess especially capable aim, you can even kill the animal in one shot by firing a projectile directly into its weak point. This will give you the Clean Kill bonus. These bonuses both result in superior harvestable materials, and if you get both of them, you'll achieve the highest quality items from your successful kill.

With these tips in mind, you're hopefully on your way to hunting with harmony. Be sure to whisper thanks to every animal that you slay, recognise that you're but a small part in the great loom of life, and consult our other guides if you need more tips on navigating Pandora. We've got a list of tips and tricks for those just starting out with Avatar: Frontiers Of Pandora, and our guide to gaining Na'vi favour will also be useful for newcomers.


