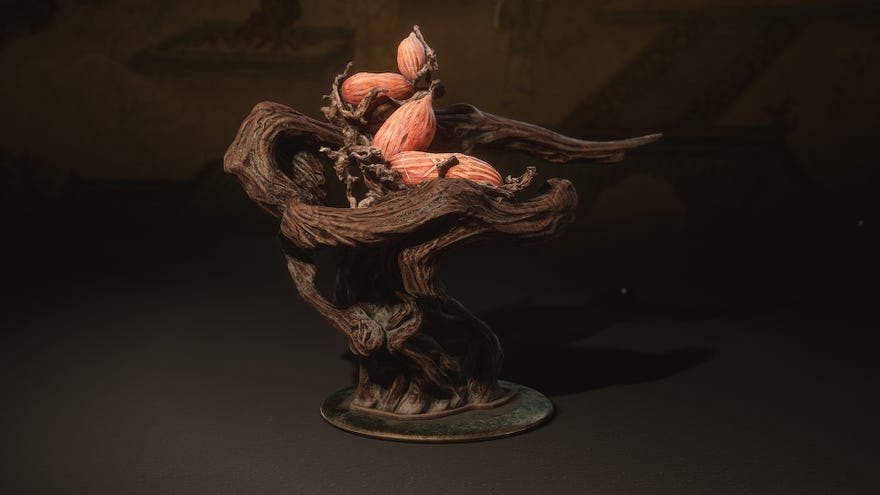
Black Myth Wukong Luojia Fragrant Vine locations
Upgrade your Gourd by finding every Luojia Fragrant Vine in Black Myth Wukong
Looking for Luojia Fragrant Vines in Black Myth Wukong? If you wish to upgrade your Gourds to get increased Gourd 'uses' - meaning more health recovery before you need to rest at a Shrine - Luojia Fragrant Vine is the item you need.
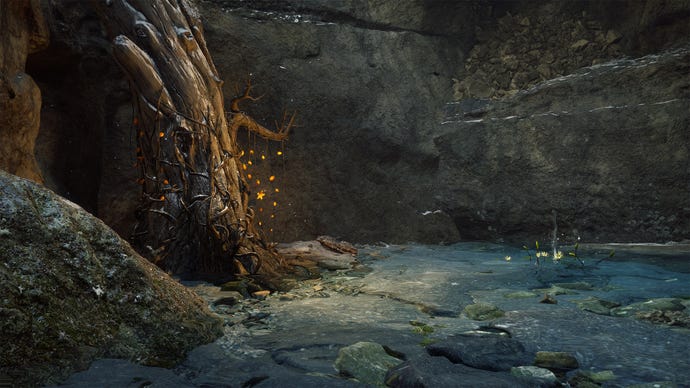
Luojia Fragrant Vines are hidden across Black Myth Wukong's many regions, where they'll appear as sparkly yellow flowers growing against large trees. Despite their soft glow, beware that these vines are fairly easy to miss unless you know where to look.
That's where this guide comes in; whether you search for them in the wild or buy them from Shen Monkey, here's how to find every Luojia Fragrant Vine location in Black Myth Wukong. Once you've gathered a bunch of them, just visit the Shen Monkey to get your well-earned Gourd upgrades.
In this guide:
Luojia Fragrant Vines sold by Shen Monkey
Not every Luojia Fragrant Vine is found in the wilds; you can purchase up to three Luojia Fragrant Vines from the Shen Monkey. Although this merchant becomes available in Chapter 1, beware that he doesn't have any Luojia Fragrant Vines in his inventory yet, as you must meet the requirements first:
- Luojia Fragrant Vine 1: Complete Chapter 2
- Luojia Fragrant Vine 2: Complete Chapter 3
- Luojia Fragrant Vine 3: Complete Chapter 4
In other words, you can buy your first Luojia Fragrant Vine at the start of Chapter 3 by traveling back to the Shen Monkey and buying it from him. He's stationed near the Marsh of White Mist Keeper's Shrine in the Black Wind Mountain's Bamboo Grove (Chapter 1). Walk down the wooden platforms and turn right at the first opportunity to find him. The first vine costs 2000 Will, the second costs 3000 Will, and the third costs 6000 Will.
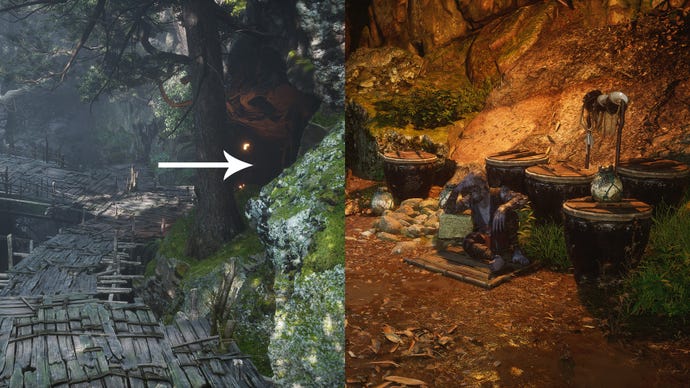
Beware that once you've completed Chen Loong's questline, Shen Monkey will move to the Zodiac Village - the hidden region unlocked during this quest.
Chapter 1 Luojia Fragrant Vine locations
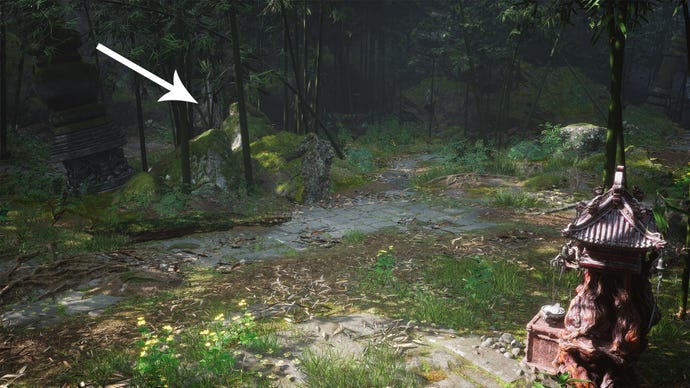
There's only one hidden Luojia Fragrant Vine location on Black Wind Mountain, and it's right next to the Marsh of White Mist Shrine. Turn your back to the Shrine and look across the path; you'll see the vines growing on a large tree behind the bamboo.
Chapter 2 Luojia Fragrant Vine locations
There are two Luojia Fragrant Vine locations in Chapter 2. Before you start searching for them, make sure you've unlocked the nearby Shrines. Our Black Myth Wukong Keeper's Shrine guide can help you with that.
Windrest Bridge, Yellow Wind Formation
Start from the Windrest Bridge Shrine in Yellow Wind Formation, then cross the bridge and pass through the old village (go left at the first opportunity, up the stairs to your right, then down the stairs to your right, and then left). As soon as you leave the village through the back gate, you'll see the Luojia Fragrant Vines on your right.
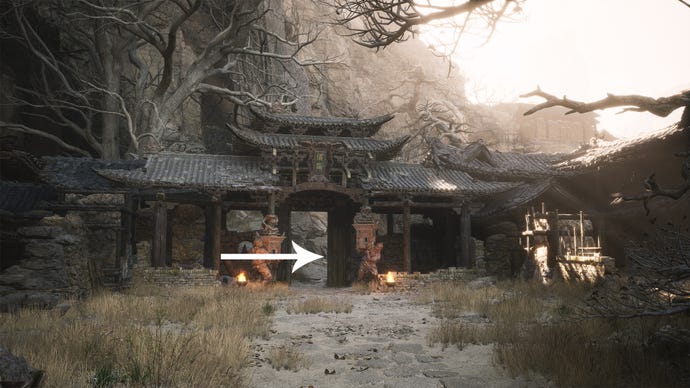
Windseal Gate, Yellow Wind Formation
Go to the Windseal Gate Shrine in Yellow Wind Formation and walk in the direction of the high tower. Just in front of the tower, turn left - the Luojia Fragrant Vine is in front of you, next to a statue. Be careful though; that enemy in front of the vines is the Gore-Eye Daoist, who'll immediately attack you.
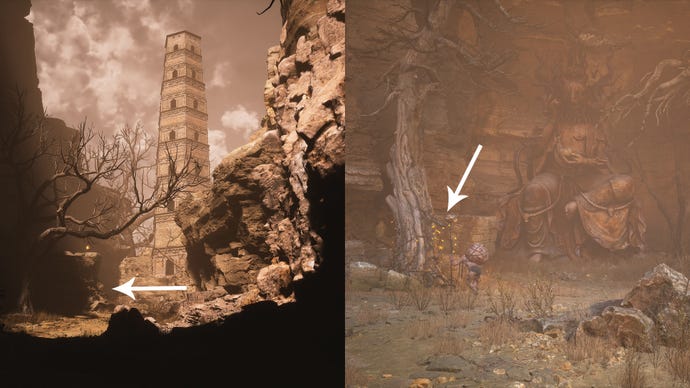
Chapter 3 Luojia Fragrant Vine locations
Besides the one you can buy from Shen Monkey, there are three Luojia Fragrant Vine locations in Chapter 3. Here's where to find them.
Outside the Wheel, Pagoda Realm
Start at the Outside the Wheel Shrine in the Pagoda Realm (which is at the top, following the 'rotating' pagoda section) and go upstairs into the dark cave. There's a shallow pond with the Luojia Fragrant Vines behind it.
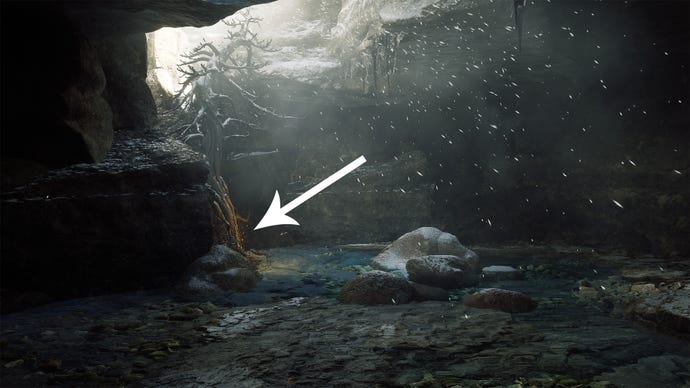
North Shore of the Bitter Lake, Bitter Lake
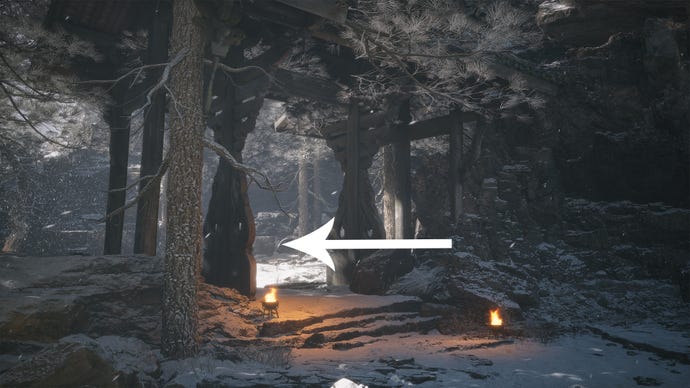
Following the Pagoda Realm, you'll find yourself on some snowy plains with a massive frozen lake in the middle; the Bitter Lake. Go to the North Shore of the Bitter Lake Shrine and walk in the direction of the lake, then turn left at the shore. Keep following the shoreline for a while until you see the spine fossil - it's shaped like an arch across the path. Instead of passing through this arch, take the path to the left.
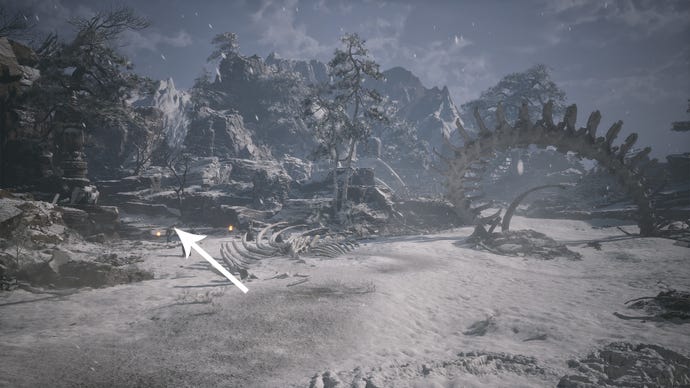
Turn left at the first opportunity, and left again when you reach the top of the stairs. You can easily recognize the correct gate by the two flames at the entrance. The Luojia Fragrant Vines will be in front of you, but beware that two airborne enemies will spawn when you approach.
Longevity Road, Valley of Ecstasy
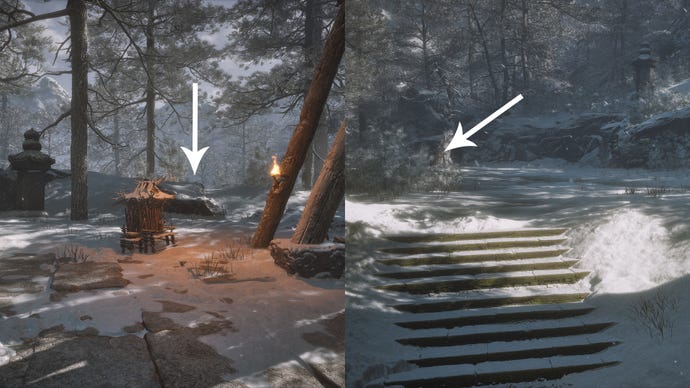
Start from the Longevity Road Shrine (on the road leading past the massive guardian), and run down the slope behind the Shrine, away from the path. The lower road leads to a staircase; go up those stairs and continue following the path for a while - just run in the same direction until you eventually find an open spot with the Luojia Fragrant Vines on the other side. Beware of the airborne enemy who will spawn upon your approach.
Chapter 4 Luojia Fragrant Vine locations
There are four Luojia Fragrant Vine locations in Chapter 4. The one near the Cliff of Oblivion is probably the hardest to find, but beware that the one on Purple Cloud Mountain requires access to this secret area. To get there, you must defeat the Venom Daoist boss twice: when he's stuck in the "Odd Cocoon" near the Pool of Shattered Jade Shrine, and in the arena accessible from the top of the hill behind the Court of Illumination Shrine.
The Verdure Bridge, Webbed Hollow
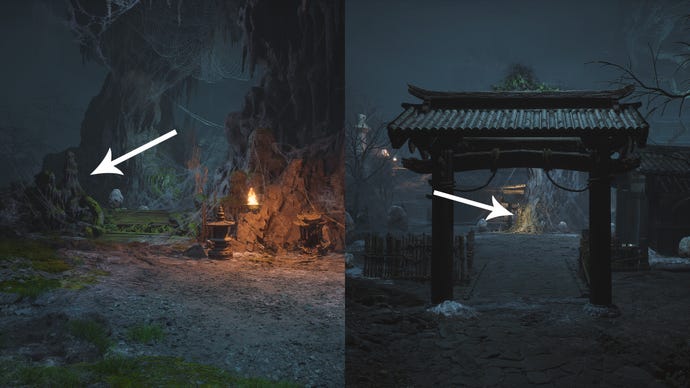
This Luojia Fragrant Vine location is in the old village behind The Verdure Bridge Shrine. Starting from this Shrine, cross the green algae-covered wooden platform and turn left. Instead of crossing the bridge, drop down into the gorge on your right and follow the path ahead (stick to the left). This path leads into the village where you'll find the Luojia Fragrant Vine in the center, guarded by a large scorpion enemy.
Cliff of Oblivion, Webbed Hollow
Facing the Cliff of Oblivion Shrine, take the path to the left (if this is your first visit, you must defeat Buddha's Right Hand to continue). Go straight ahead, cross the dragonfly bridge, and drop down. Immediately turn right and follow the path as it circles around the rock pillar. When you see a small wooden ledge on your left, drop down again.
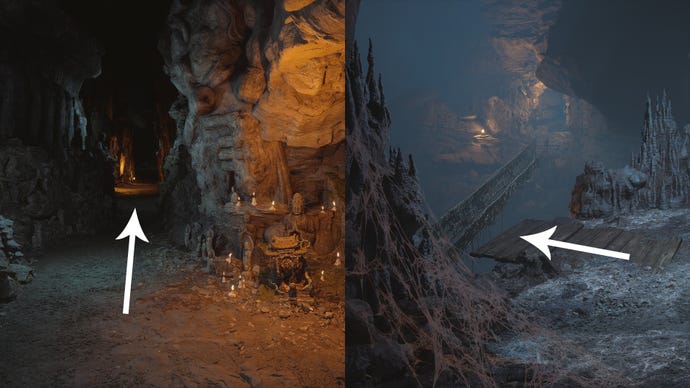
Cross the suspension bridge, continue through the large cave room, and cross the narrow bridge between the cocoon spiders. You can use Cloudstep to avoid a fight. In the next area, you'll find the Luojia Fragrant Vine on your left.
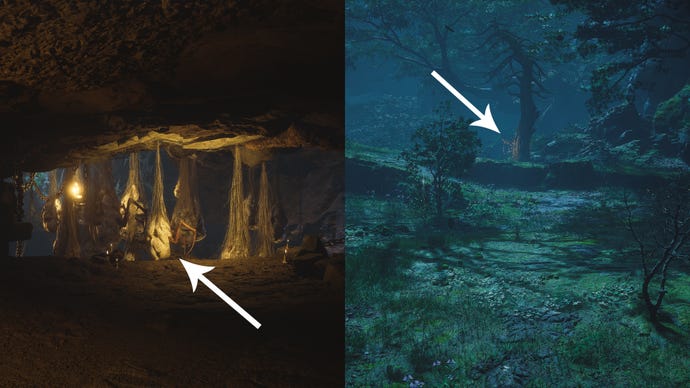
Mountain Trail, Temple of Yellow Flowers
This Luojia Fragrant Vine location is right next to the Mountain Trail Shrine. It's almost impossible to miss this Shrine as it's on the main path just after defeating the Violet Spider boss.
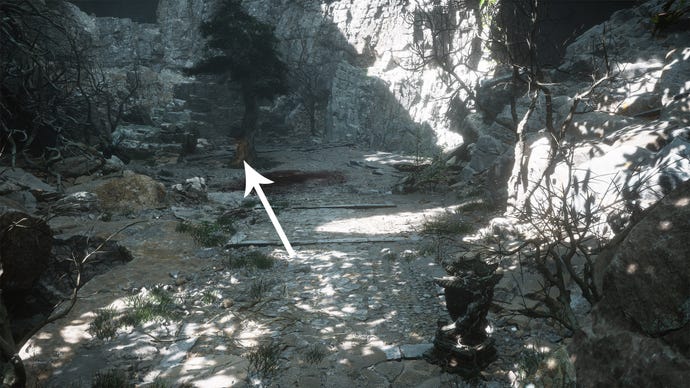
Valley of Blooms, Purple Cloud Mountain
The final Luojia Fragrant Vine location in Chapter 4 is very close to the Valley of Blooms Shrine (situated on the main path) on Purple Cloud Mountain. With your back to the Shrine, you can already see the Luojia Fragrant Vine on your right, across the small stream. Beware of the tree-like enemy guarding it.
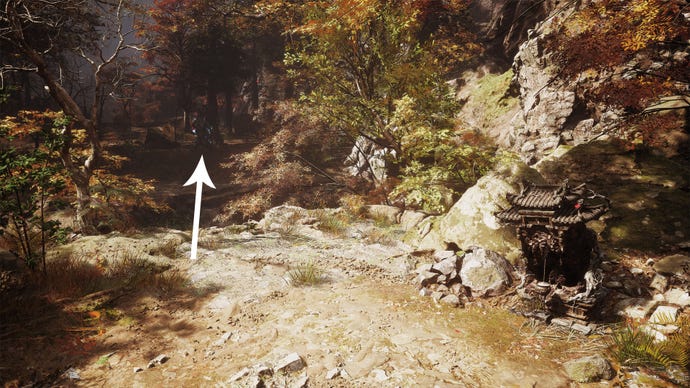
Chapter 5 Luojia Fragrant Vine locations
There are two Luojia Fragrant Vine locations in Chapter 5. You don't need to access any secret areas, but beware that you need to make your way to the Bull King (end of the Chapter) to grab the one near the Fallen Furnace Crater.
Height of Ember, Woods of Ember
Walk towards the buildings next to the Height of Ember Shrine. Before you reach the furthest part of the village, walk down to the left. Stick to the right side of the path and it'll lead you directly to the Luojia Fragrant Vine.
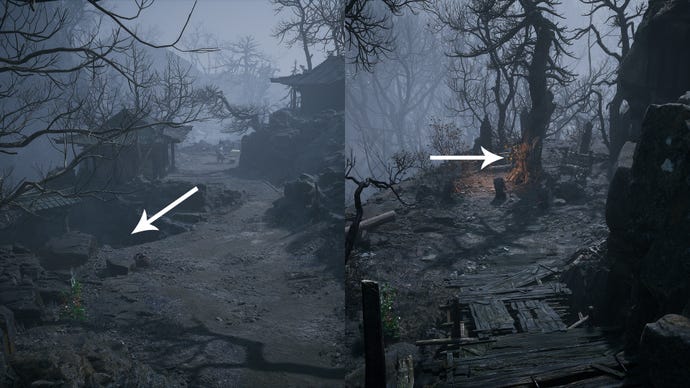
Fallen Furnace Crater, Field of Fire
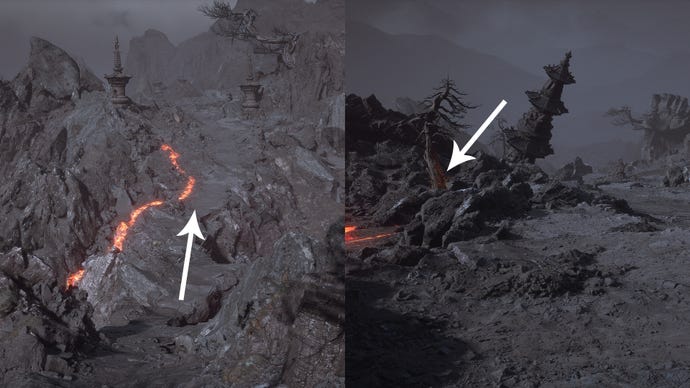
From the Fallen Furnace Crater, the final Shrine in the Field of Fire, walk down the slope. As you're walking away from the Bull King and down the path that was previously guarded by an automated boulder, go left whenever you can. The ashen plains below you are home to the Stone Vanguard boss (looks like glowing rocks from a distance). If you look carefully, you can already spot the Luojia Fragrant Vine on the left side of this boss arena.
These are all the Luojia Fragrant Vines in Black Myth Wukong. Once you've found them all, you might want to collect the Awaken Wine Worms and find every boss location too. Don't forget to unlock all the Keeper's Shrines along the way and equip the best skills while you're at it!
